MAP BOX
The Map Box is provided by Vans as an option for the instrument panel. Most small light airplanes have too little storage, so I decided to install a Map Box in my Panel. The Map Box comes as a standard option for the usual one-piece instrument panel that Vans provides. Usually the Map box is just rivetted to the panel and fixed in place. But I am using Fabian Lefler's three-piece Modular Panel, so I want to be able to remove my panels if necessary. So I decided to install the Map Box door in my right hand panel, and to use platenuts to allow the panel to be removed from the map box if necessary. This required a fair amount of experimentation and innovation, but I think it has all worked out OK. One minor complication arose from my need to have three small round instruments on this panel - Oil T&P, Electric V&A, and Thachometer (all EI). This meant I had to place the map box further to the right than the standard location. I will need to remove some of teh right hand fuse deck to do this (similar to the "tip-up" installation). This will not be a structural problem, because the Map box will be anchored to the deck and subframe assembly with rivets. The finished map box/deck/subframe assembly should be stronger than the original.
The first image shows my intention to have the map box door mounted FLUSH with the panel, rather than Vans "top edge over-the-panel" design. The door was kept in position as the hinge was aligned with both door and panel (image 2). The Camlock faster was positioned to as to give best door position. It was match-drilled and attached with flush rivets.Image 4 shows the camlock receptacle mounted in a flush plate (my design - Vans has the map box lid COVERING the panel). Because I want to be able to remove the panel at any time, I had to use PLATENUTS on the map box surface flange, together with countersunk mounting screws (image 5 - platenuts on wrong side of flange, for match-drilling). Because I need to use platenuts to attach the box, I had to use double-flush rivets to attach the door to the panel and the Camlock receptacle to the mapbox flange. The overall result is not too bad at all. I chamfered the panel and door edges to give maximum door opening angle (about 80degrees). Infortunately to have the door open to 90 degrees you have to allow a large unsightly gap over the hinge pin. I reduced this gap and chamfered - my door opens to about 70-80 degrees, but the appearnace closed is better than it would have been. Next time i will be more carefull cutting the door hole so there os only about 1/32" gap between door and panel. I have a 1/16" gap all around. It will look OK when painted Ii think.
TIP: The critical workflow here is first to cut out the panel hole as accurately as possible. Then trim the door foor a good free fit (say 1/32" gap all around). Then matchdrill with the hinge and camlock attach lug in position and done up.
|
Aligning map box door |
Aligning hinge |
And camlock fastener |
Camlock receptacle mount for flush.. |
The map box body |
Hinge position double flush rivets |
Looks good! Countersunk |
Map box in position |
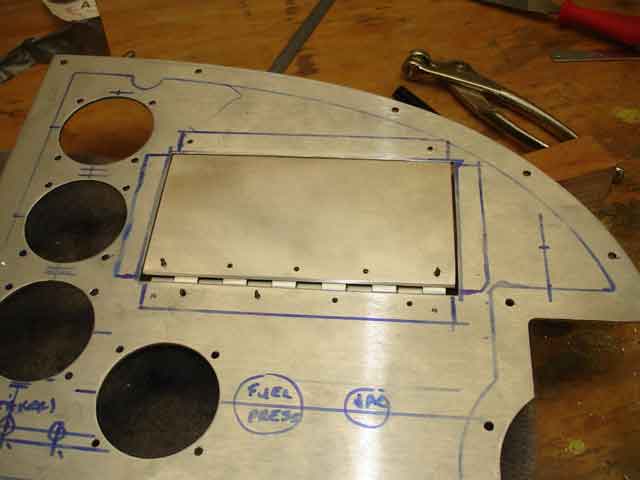

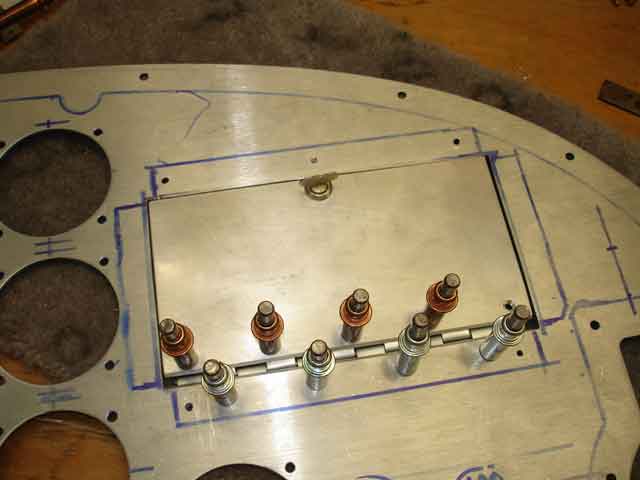
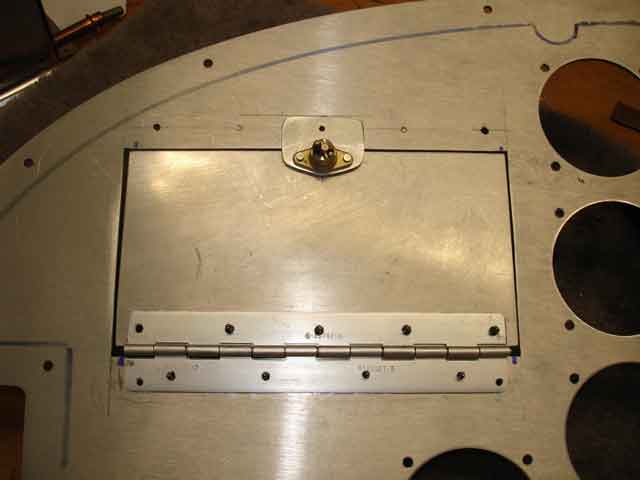
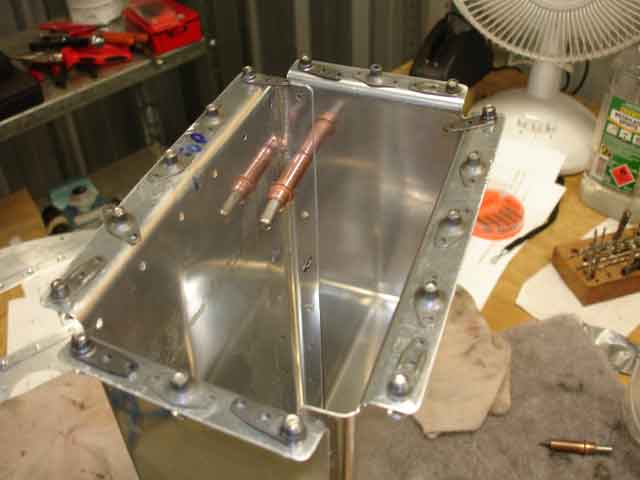
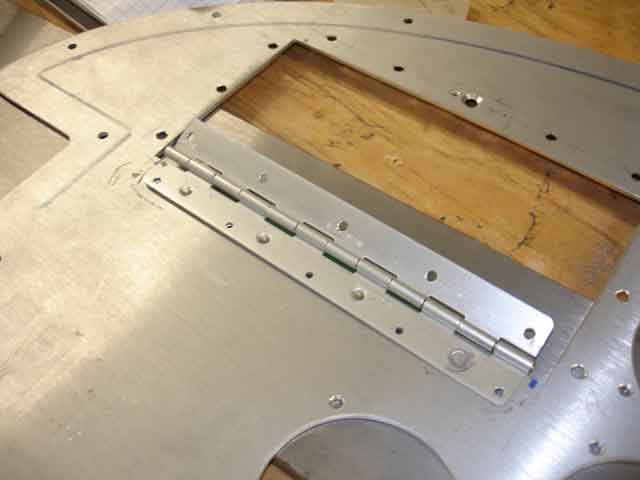
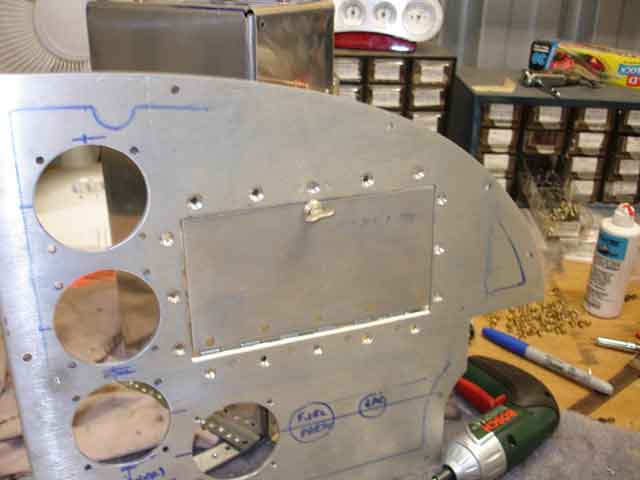
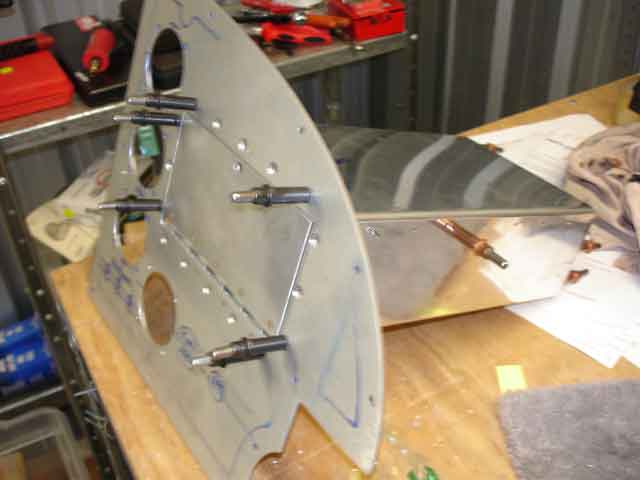
Image 1 shows the finished map-box, before priming. A few months later I had primed everything and got to the stage where the map box had to be fitted to the sub-panel. I used a right-angle set square to find the location on the sub panel of a hole to receive the map box extremity. Then I used a drill, a file, and a hacksaw to cut the hole out of the sub-panel (image 2). Image 3 shows that I got it pretty right. I also had to trim some of the fuse deck flange to shich the sub-panel is attached. I left three hooes for rivets which should be enough (image 3). To provide reinforcement, you need to fabricate four pieces of Al angle which support the map box at the subpanel (images 4-6). I bought some self-afhesive door sealer which was stuck to these pieces of angle and which supports the map-box gently in position. Image 7 show the final result which is not too bad at all.
|
How it will look eventually |
Hole in sub-panel
|
which fits the box
|
note angle reinforcement
|
top, bottom and..
|
left and right
|
all primed and complete
|
|
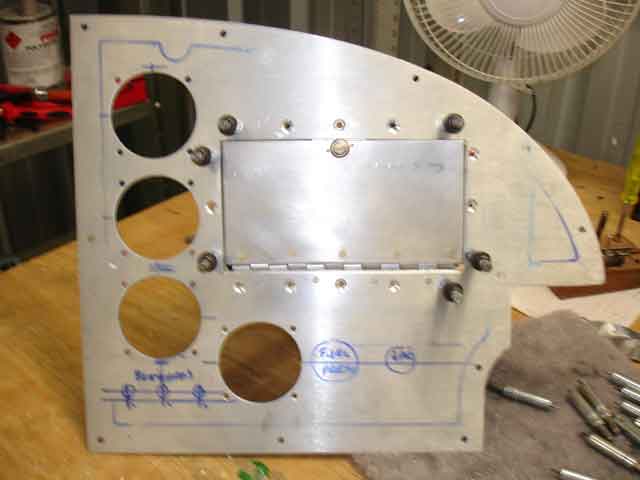


Map box and related finished November 2006